Adding social login features to your website gives you extra success in acquiring plenty of users. Facebook login is one such most popular feature my clients ask. In this article, you will learn to add Facebook login to your website.
The integration involves many steps from creating a Facebook app to write code for your website. Here, we’re focusing only to create the app. You will be able to properly set a Facebook app after reading this article. Later, we will use credentials obtained for the app to authorize users on our website through Facebook login or register.

Creating a Facebook App for Your Website
In my experience, properly setting up an app on Facebook requires more steps than Google, Twitter or any other social media. So I decided to include this part in a separate article. So head to Facebook Developer page and login with your credentials.
Once you’re logged in, you will see My Apps menu. There, click the “Create App” button. Then create an app by providing the title and the contact email. Since we do need Facebook Login, hit its Set Up button from Add a Product section.
Facebook Social Login – Setting Up
 So far, you have created an app and added the Facebook Login product. Now you have the panel as shown in the third screenshot. Here you need to deal with Basic and Advanced set up as well as configuring Facebook Login.
Before proceeding, I want to let you know something. Facebook offers two modes for the app. First is the development mode and the second is the live mode. Further, it keeps the app in the development mode until you provide all the information and then switch to live status.
In that way, you can test your social login integration before making it live. However, if you’re only learning social login integration locally then the development mode is enough. You can directly start configuring it.
But if you switch the mode after testing or due to some other reason, many fields in the app configuration need changes. So I’m not a fan of this toggle approach. Rather, I prefer the following approach:
- Prepare the live version of the app first.
- Create a test copy of the live app
- Amend the test copy as per development configuration.
This makes app maintenance a lot easier. It also saves time by not messing with app fields during the mode change.
Basic Settings for the Live App
So start with the Basic menu and provide all the details. I have shown an image on the top, from one of my live apps for you.
The App Domain is your domain name. If your website starts with www then add it here. The Privacy Policy URL and Terms of Service URL are compulsory. Also, these both should begin with your App Domain name.
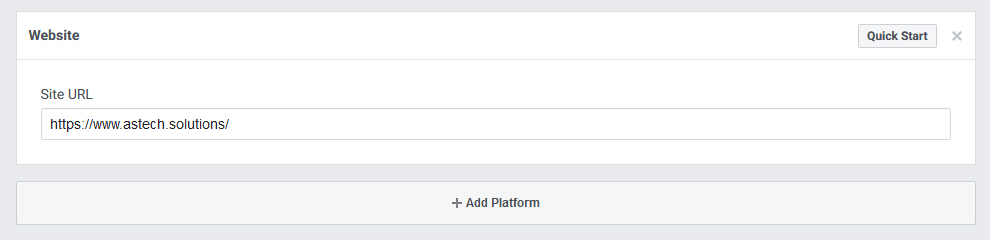
I have left the Data Protection Officer Contact Information blank. You can fill it if required. Next, tap the App Platform and add “Website” as the platform. Further, provide the Site URL. Usually, it is the same as your App Domain.
The live app requires a business or individual verification as well. If you need only the user’s email and basic profile access then it is easier. Else you might need additional verification steps.
Advanced Settings for Facebook App
Scroll through the Advanced Settings page and update whatever is applicable. Setting these fields may vary if you’re using Facebook Login for more than one platform. Additionally, the security of your app is much important. So deal with the Security section here carefully.
We will use only server-side calls to authenticate users for the website using App Secret. So it is better to add your server’s IP address to the Server IP Whitelist. Set Require App Secret to Yes if you have the only a website. If you’re allowing social login through a native Andriod/IOS app as well then set it to No.
Also set Yes to Require 2-Factor Reauthorization and No to Allow API Access to App Settings. If you have a Facebook page for your website or business, add that to the App Page section. You can also read this guide to smoothly link the page.
Configure Facebook Login for the Website
The app has been set up, good so far. Now a few settings need updates to let users log in or register to your website through their Facebook accounts. Set the following fields as given:
- Client OAuth Login – Yes
- Web OAuth Login – Yes
- Enforce HTTPS – Yes is recommended and your site must use SSL
- Force Web OAuth Reauthentication – No
- Embedded Browser OAuth Login – No as we’re not using any Webview here (a component in mobile apps)
- Use Strict Mode for Redirect URIs – It will remain Yes and disabled for a live app.
At last, you must provide Valid OAuth Redirect URIs. It is the page on your website where Facebook will redirect its page after the user’s action. It must have the domain name from your App Domains in the Basic settings.
In our CodeIgniter tutorial, social class and auth function will handle the process. So if the App Domain is https://www.yourdomain.com then the URL will be https://www.yourdomain.com/social/auth/. Also, don’t forget the trailing slash at the end. Save all and change the status to Live.
Add Facebook Login – Test App

You’ve set the Live version of the app to let users Sign In/Up on your website with Facebook. Now you need a development version of the same. Head to the top left corner of the page and click the dropdown that shows the name of your app. There you will see the “Create Test App” button. The button will create a copy of your live app to test social login/register with Facebook.
Thus, the test app is a replicate copy of the live one with necessary changes. Here update development-related configuration only without affecting the live site settings.
Social Login/Register in Development Mode
So for the test app, you can reset values depending on the development configuration. Further, a typical Facebook Login test app’s Basic Settings would be:
- App Domains – http://localhost OR https://localhost
- Terms of Service URL – Empty
- Privacy Policy URL – Empty
- Site URL – http://localhost/ OR https://localhost/
In Facebook Login settings, enable or disable the Enforce HTTPS option as per your localhost URL’s protocol. Also, update the Valid OAuth Redirect URIs to http://localhost/HTDOCS_DIR/social/auth/. Replace HTDOCS_DIR with the name of the directory containing website files in the local installation.
Additionally, you may have custom local domain name instead of localhost or port number. If it is true then update the App Domains, Site URL, as well as the OAuth Redirect URIs accordingly. Further, there are no special Advanced Settings for development.
Integrate Facebook Login to Website
Congratulations! You’ve created an app that will authorize users on your website through Facebook social login. Also, it is common that people face troubles in adding or setting up Facebook Login. In that case, I would recommend checking our Facebook app troubleshooting article.
Now the website needs some code to integrate and test Facebook Login. Read that here and most welcome your comments and questions.
I followed all the tutotial but I can’t get handle response. It’s reentering the auth method. It just keep redirecting from and to facebook. Anyone can help?
Hello Abdallah
In that case, I suggest you try to catch the response on some other controller with the index method just for knowing what do you get. You can write to amit@astech.solutions for premium support as well.