This tutorial isn’t just about how to install and configure CWP on a server. It is rather a complete guide to help you to set up a server or VPS from start to finish. You will not only install & configure the Control Web Panel on a CentOS server but also become proficient to handle a VPS yourself.
If you are new to VPS hosting and don’t know how to proceed then this article is for you. You will have the good technical expertise to manage servers after reading this install & configure CWP on the CentOS guide.
- My Experience with the First Virtual Private Server
- Managed vs Unmanaged VPS
- What VPS Configuration do I Need?
- About CWP – Control/CentOS Web Panel
- Web Hosts Offer Application Installation too
- Details You Get when Buy a VPS
- Early Pointing Domains to VPS with Custom Nameservers
- Setting up the Server – Basics & Beginning
- Installing CWP
- Accessing the CWP Admin Panel
- Configure CWP (Control Web Panel)
- 1. Securing the Server
- 2. Edit Nameserver Records
- 3. Changing Hostname
- 4. Checking Server Date and Time
- 5. Admin Email Settings in CentOS Web Panel
- 6. Setting up Default Web Servers
- 7. Choosing the Right PHP Version
- 8. Managing Hosting Packages in CWP
- 9. CentOS Web Panel – User Accounts
- 10. Enable Admin Services in SSL Certificates Module
- Install & Configure CWP on CentOS – What is Next?
My Experience with the First Virtual Private Server
When I bought the first VPS from ResellerClub, I didn’t know enough about it to get started. Luckily, it had the WHM/cPanel software preinstalled for server administration. Still, I had to learn a lot of technical stuff to be able to effectively handle that.
Later when I became proficient, I found the server expensive in long term. Additionally, I started implementing things myself rather than waiting for the host to perform them. Also, I liked my granular control than sharing stuff with hosting guys.
So I searched for alternatives. Then I came to know that I’m using a managed VPS which is much costlier compared to an unmanaged one. I switched to unmanaged hosting with vpsserver.com and now I’m a fan of unmanaged VPS.
I have mentioned the differences between both types of VPSs in the next section. I found CWP a better and suitable application among many for server and hosting management in unmanaged VPS. Still, the information, how to install and configure the CWP, how to set up & secure the VPS and make it ready, all were discrete at that time.
So I decided to gather all the scattered information into one place and here is this guide. You will not only learn to set up VPS from start to finish but also know various aspects like choosing the right VPS, SSH, security, performance.
Managed vs Unmanaged VPS
While there are several types of VPS products available, we’re focusing on a very important difference. This is managed vs unmanaged VPS hosting.
A hypervisor software divides a physical server into tens or hundreds of virtual servers. Each of them runs its own OS as well as acquires a certain portion of the server’s resources. So basically a VPS you purchase, is a virtual server or container in a dedicated physical server.
Managed VPS
In managed VPS, the service provider is responsible to take care of the server like core updates, maintenance, and software installation. So you can focus on running websites while leaving server management tasks to them.
Managed VPS hosting has its own advantages and disadvantages. On the positive side, you get support. You don’t require having that technical knowledge. Also, it saves time for you.
However, you pay extra money to the hosting provider for managing services. Also, the cost increases due to the license fee of the server management software like cPanel or Plesk used.
Further, depending on the hosting plan, you may have or haven’t the root access to the server. So you may have to depend on the hosting support.
While it’s purely a matter of faith as web hosts already have access to all data stored on the server despite the type of hosting, remember that you grant DIRECT access to your data on the VPS for the host in a managed hosting environment.
Unmanaged VPS
It is you who have to take care of the server management in unmanaged VPS hosting. Either it is application installation, updates, backup feature, or security of the virtual private server.
The hosting provider only takes care of the physical server, hardware, availability, and initial Operating System installation.
So you only pay the cost of the server but invest time to manage it. But it gives you complete access to the virtual server and you can control every aspect of it. The only things you require are a little time and initial technical expertise that you will gain in this article.
Managed or Unmanaged – Which VPS is Right for Me
Now here is the key question. Managed or unmanaged one, which VPS you should select? The explanations below will help you to choose the better option.
- It requires quite a little or less time every once or twice a month to maintain the VPS after the initial setup.
- Generally, the server management application like CWP or cPanel updates itself with its automated script.
- Not all those programs offer automatic RPM packages updates. In the case of CWP, only the pro version provides an option to update all or selected packages. Just, it is not a configure once and forget thereafter option. Besides, the SSH command always exists to easily update packages.
- While I’m not a Linux administrator, I didn’t find it difficult or technically incapable to manage VPS.
However, there might be cases when you feel the need for the host’s support if not everything is set up properly. For example security concerns, unexpected technical issues as well as lack of time at a certain point.
If you’re unsure then my advice is, read this guide and try unmanaged VPS hosting first for a month through a monthly plan. If you feel ok then continue with it else upgrade to managed or buy the Service Level Agreement to receive the host’s support. SLA is kind similar to managed VPS hosting.
Finally, below are points mentioning conditions when each of these could be a better choice.
Unmanaged VPS if Good if You
- Want cost savings.
- Don’t have crucial business requirements.
- Want to learn everything from the basics.
- Don’t want to give control to an outside party.
Pick a Managed VPS if You
- Feel yourself less-confident.
- Still lack technical expertise.
- Want to focus only on the business.
- Can wait for your request to get processed.
What VPS Configuration do I Need?
Hiring servers is somehow like buying computers. When you buy either, you have to consider CPU, RAM, storage requirements in common. Bandwidth is an additional consideration for servers. While these vary for websites and businesses, here are a few practical tips to choose the right configuration.
Check the Requirements of Server Management Application
The first consideration is checking the requirements of the VPS management program you wish to use. You can visit the official website of the program for this. For example, CWP requires a 64 bit CentOS Operating System and recommends 4+ GB of RAM.
Antivirus and Email Services Require Significant Memory
Antivirus and system scanning services demand a considerable memory. The same is true for email and spam protection services. So if you’re using these services then 4GB minimum memory is advisable for CWP.
In contrast, if the VPS is for a small and personal level without email services, you can cut down the memory requirement to half. I have also utilized a low resources VPS with moving email operations to a third-party service.
Disk Space and Bandwidth Consideration
On average, 20GB disk space is good for the Operation System, server management program, applications, and updates. The websites’ hosting requires additional space. Further, a backup feature always demands a huge availability of storage space.
Usually, servers come with plenty of bandwidth. So websites with average traffic don’t reach that limit. However, this can be an important consideration for huge traffic websites.
Software and Relevant Considerations
Acquiring knowledge before buying VPS hosting can help to choose the right VPS, saving significant money, as well as better management.
For example, a VPS I inquired about had OpenVZ virtualization technology instead of KVM. As result, I won’t be able to restrict traffic from certain countries due to the limit of OpenVZ. Thus I always use KVM-based virtual private servers.
The reliability of the host and the scalability of the server, both are important considerations. Always choose a reputed host that offers VPS scalability. It allows to us start with a reliable VPS with minimal resources and expand it later as requirements grow.
Similarly, there are standard (private) virtual servers as well as cloud VPS. And the latter is better. All web hosts I mentioned in the article, provide quality VPS services. Also, each of them is well-known in the industry.
About CWP – Control/CentOS Web Panel
CentOS Web Panel is a free web hosting control panel for quick and easy management of dedicated as well as virtual private servers. It is a web-based application with a GUI and a set of tools to simplify server management processes.
There are other cPanel alternatives as well. But I prefer CWP because it appears as a feature-rich panel. While it is not completely free, the free version has plenty of options and does its job beautifully. Also, the price of the pro version is quite economical.
Formerly, CWP was known as CentOS Web Panel prior to its release for CentOS version 8. And the old website link is http://centos-webpanel.com. This website has the documentation related to CWP for CentOS 6 and 7.
With the release of CWP for CentOS 8, the developers have officially renamed it to Control Web Panel. Also, they have set a separate site for this. You can find all the recent information using the link https://control-webpanel.com.
Web Hosts Offer Application Installation too
When you buy a VPS, you’re being asked for an Operating System like CentOS, Ubuntu, Fedora, or Windows OS alternatives for the server. Further, some web hosts also offer a list of hosting management applications (cPanel, Plesk, CWP, VestaCP, Froxlor, etc.). There you can choose one and the host will install it for you.
If you have this facility then you can get Control Web Panel (CWP) preinstalled. However, I would suggest, don’t use the application installation feature offered by the host. Rather follow this easy tutorial to understand what are the processes and steps.
Once you have understood, you would never have any trouble in setting up a VPS regardless of the web hosting company you pick. You will also learn new things that are never present in shared hosting.
Details You Get when Buy a VPS
When you buy a VPS, the web host provides you a set of credentials to let you begin. It includes:
- Username – It’s generally “root”.
- Password
- Server IP
- SSH port – By default, the port is 22.
Early Pointing Domains to VPS with Custom Nameservers
You have obtained the IP address of the server. So you’re capable to point domains to the VPS. Doing it earlier would let you rather smoothly set up hostname and NS records in the CWP later. It will also help you avoid waiting for domain propagation as well as facing unnecessary issues.
Due to the above reason, it is a good idea to point at least the main domain under which the hosting account is setup. Later, you can follow an almost similar approach to point additional domains.
However, if the main domain is in production. Or there is a website set up on that, perform the nameserver change later to minimize the downtime.
Adding Child Nameservers at Domain Registrar Level
These steps are only for the main domain of the VPS. You need to create two child nameserver records for this domain.
Assuming that the main domain is example.com and the nameservers we will use are ns1.example.com & ns2.example.com. Also, the IP address of the server is 123.132.231.12. The steps are:
- Login to the domain registrar’s website.
- Go to the DNS management page of this domain.
- Find the section that allows to set up child (branded/custom) nameservers.
- Add two records so that they could appear like:
| Nameserver | IPv4 Address |
|---|---|
| ns1.example.com | 123.132.231.12 |
| ns2.example.com | 123.132.231.12 |
Pointing Domains to Custom Nameservers
In the previous step, you have registered two custom nameservers. Now you can use these child nameservers as nameservers for other domains. Know that registering child NS in the main domain doesn’t mean that it will automatically start pointing itself to those.
The main domain needs to point as well by specifying the NS. To point the domain example.com to the VPS using branded nameservers:
- Login to the domain registrar’s website.
- Go to the DNS management page of this domain.
- Find the section that allows adding nameservers records.
- Add two records so that they could appear like:
| Nameserver 1 | ns1.example.com |
|---|---|
| Nameserver 2 | ns2.example.com |
Point all other domains you want to host on the VPS by replacing nameservers with the child NS of the main domain. Also, don’t forget to replace server IP, domain name, as well as nameservers with actual ones.
Technically, it takes up to 48 hours to propagate before the record is fully active. In general, it starts reflecting in a few hours. Also, it would work only after you would have added domains in the VPS management application (CWP here) which will generate necessary DNS records in turn.
Setting up the Server – Basics & Beginning
In the next few sections, you will learn to install Control Web Panel. Keep in mind that CWP requires CentOS 64 bit Operating System. It doesn’t work on other Linux-based OS.
So I assume you have purchased a VPS and chosen CentOS as Operating System during the checkout. If not then visit vpsserver.com and get a free VPS for 7 days.
It doesn’t matter that the VPS is either managed or unmanaged. The essential things are it should have CentOS installed. Also, there should be no other hosting management application preloaded.
If you are using a VPS the very first time, it might be a bit trickier for you to set it up initially. It’s because it requires connecting through the command-line and issue commands. There is no Graphical User Interface yet unless you get a server management application preinstalled.
However, it is pretty simple to connect and operate the VPS after knowing the right tool. Also, there are plenty of tutorials on the internet to know the right command for an operation in the given OS. Nevertheless, using the command-line is a prominent and efficient route that you must know.
Understanding SSH Access and Connecting to VPS
SSH is a protocol and essential tool for remote systems administration. It is deployed on millions of servers and used by system administrators and application developers.
So if you have never heard or used SSH before, visit this complete guide to understand SSH and use it to connect to the server.
While the article covers SSH security as well, I recommend returning here after connecting to the VPS. So that you can install CWP first and implement the SSH security just after that with much ease.
The security of the server is our topmost priority. So you will sooner learn key-based SSH auth as well as hardening the VPS security.
Installing CWP
Ok, so you have shell access to the system with root privileges. Run the following commands to update existing packages, optionally install the wget package and change the current directory.
1 2 3 | # yum -y update # yum -y install wget # cd /usr/local/src |
Below, you will find the code to install the compatible version of CWP in CentOS 8, 7, or 6. Also, note that it would take some time to complete the installation (usually around 15-20 minutes).
Install Control Web Panel in CentOS 8
1 2 | # wget http://centos-webpanel.com/cwp-el8-latest # sh cwp-el8-latest |
Install CentOS Web Panel in CentOS 7
1 2 | # wget http://centos-webpanel.com/cwp-el7-latest # sh cwp-el7-latest |
Install CWP in CentOS 6
1 2 | # wget http://centos-webpanel.com/cwp-latest # sh cwp-latest |

After the installation, it prompts to reboot the server. You can simply restart the server by issuing either reboot or shutdown-r now command. Remember that you will lose the existing SSH connection.
Accessing the CWP Admin Panel
So the installation of CWP is complete in the previous section. Now you can access the CWP admin panel using the SERVER_IP:2031 URL in a web browser. Just replace the SERVER_IP with the actual IP address of your server. It will display the admin login page.

If you receive a connection not private (Chrome) or potential security risk (Firefox) warning, you can simply ignore that and process ahead. We will setup the right alternative later.
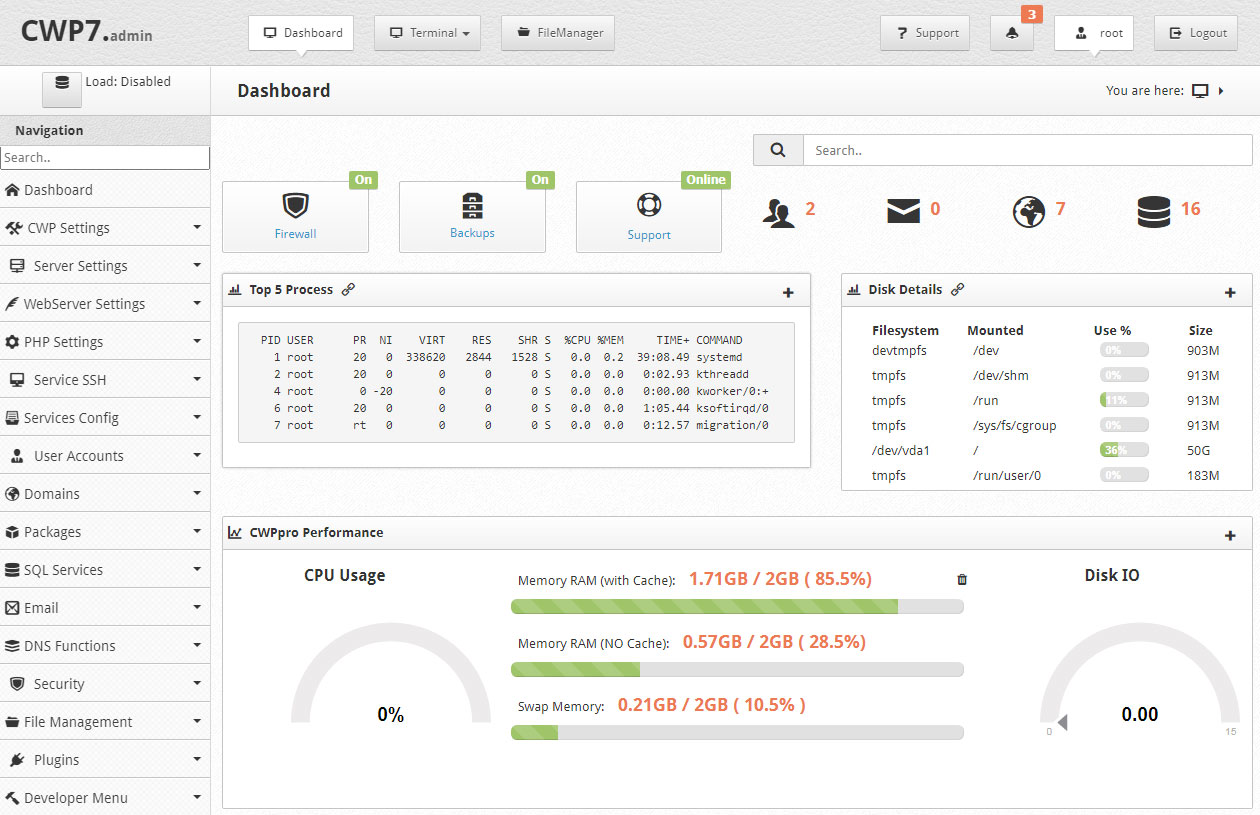
Write root in the Admin Username field, enter the password and click Login. After the login, you will see the CWP dashboard screen quite similar to this:

Configure CWP (Control Web Panel)
It is time to configure and set up the panel properly to make the VPS ready to serve. This is the part that requires the most of your time for once, especially security. But it is also the thing that will make you capable enough to handle the server despite the OS and the application.
Below are things that you need to implement in a fresh VPS or CWP. So keep reading them and make changes to the VPS accordingly.
1. Securing the Server
Securing the Virtual Private Server and Control Web Panel are the most vital tasks. Below are the security aspects that need to implement.
SSH Security
The moment you buy the VPS, it becomes a soft target for hackers trying to gain access via SSH. So I advise hardening SSH security first as soon as the server management software installation completes.
Check the guide to implement key-based authentication, disable login with username/password as well as change the SSH port. Those features will heavily improve the security of the SSH service on your server.
ModSecurity
ModSecurity is an extra layer of defense at your host to protect your websites from malicious code injected into requests. Enabling ModSecurity isn’t enough alone. Consult this article to know what is ModSecurity and how to install and manage it in CWP as well as cPanel.
Hide Processes
Secure the system more by hiding system processes and other users’ processes from each CWP user that exists on your server. To do this, visit the Security → Secure Processes navigation link.
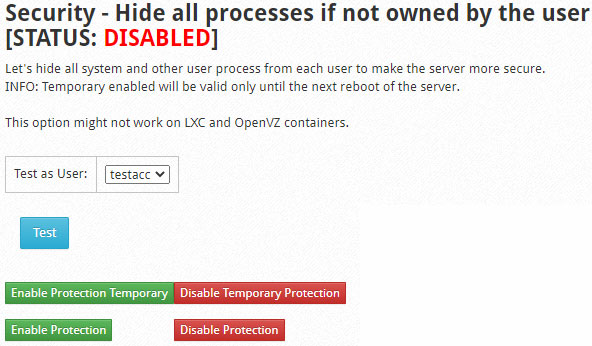
On this screen, click the green Enable Protection button to hide processes from users.
Firewall implementation
CSF/LFD firewall implementation is a robust security feature that comes preinstalled. However, It needs to configure once. Further, these practices require a detailed explanation, so I will cover them in dedicated articles sooner.
2. Edit Nameserver Records
You have already provided 2 child nameserver records at the domain registrar level. Here it needs to create DNS zones files and populate records for them. When you edit nameserver information, CWP performs those tasks.
Visit the DNS Functions → Edit Nameservers IPs link to update NS records. Provide the same nameservers and their IPs there which you have registered as child NS at the domain registrar. Also, keep the Update DNS zone file and Restart DNS Server options checked and save the changes.
3. Changing Hostname
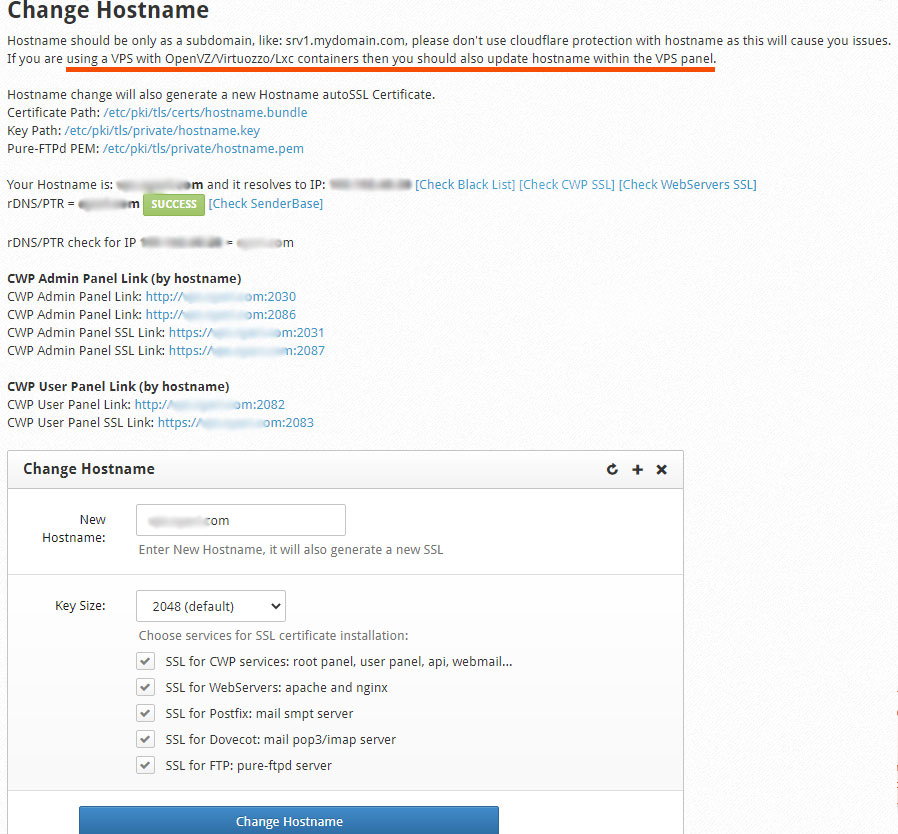
The next thing to do is setting a hostname for the VPS. From the left navigation pane, click the Server Settings → Change Hostname link.
There, provide a hostname in the New Hostname field. It should be a subdomain of your primary domain name. if the domain name is example.com then it could be server.example.com or something else. But it can’t be:
- www.example.com
- subdomains used as nameservers (here ns1.example.com or ns2.example.com)
- subdomain names starting with reserved words like cpanel, mail, webmail, cwp, etc.
After saving the page, it will update you with a new hostname as well as CWP user panel and admin panel links. Also, it should pass the rDNS/PTR check with a SUCCESS label.
rDNS/PTR Check Fails
If the rDNS/PTR check doesn’t pass then you should visit the host-provided VPS management page. It should contain a field to insert the rDNS record. Put the main domain name (example.com) there and refresh the CWP hostname page.
If there is no such option for rDNS entry then contact the host to resolve this reverse DNS lookup issue.
Some hosts also offer to set the hostname within their control panel. In that case, you can use that feature or add it within CWP. But if you are using a VPS with OpenVZ/Virtuozzo/Lxc containers then it needs to update the hostname at both places.
Securing CWP Admin and User Panel URLs
CWP generates Admin and User Panel URLs when you add the hostname as shown in the previous image. If I have server.example.com as the hostname, the recommended URLs to access panels are:
- Admin Panel: https://server.example.com:2087
- User Panel: https://server.example.com:2083
However, if you logout and access either of the URLs, the browser displays the connection not private (Chrome) or potential security risk (Firefox) warning. This is because the SSL certificate generated by CWP is self-signed.
Change and Install SSL for Hostname in CWP – Control web panel
To overcome this issue you need to add a valid A record for the hostname first. Then after CWP will obtain and install a free SSL certificate from Let’s Encrypt for the hostname. Here are the steps to change and install the SSL.
- Visit the page DNS Functions → List DNS Zones.
- Click the Edit Records button next to the DNS zone file for the hostname (server.example.com.db in this guide).
- Add an A record as shown in the screenshot below using your server values.

After adding the record, restart the DNS service by clicking the Restart button in the Info panel at the top right of the page.
Visit the Server Settings → Change Hostname page again. The hostname is already there. Just click the Change Hostname button again without making any change. It will let CWP discard the self-signed certificate and install the one from Let’s Encrypt.
At last, it needs to restart CWP. Go to the admin Dashboard page. Click the Restart CWP Services button from the Process panel.

Now logout from the CWP Admin panel, re-enable the warning, and reload the login URL (https://server.example.com:2087). There should be no warning and the browser should show a valid secured URL.
4. Checking Server Date and Time
You may also want to check once that the server is using the correct date, time, and timezone. Visit the Server Settings → Change Date & Time link for this. Notice the server’s current date & time there. It will also display the timezone.
I highly recommend the UTC timezone. You can also check the server timezone using the shell command date +%Z. Below is my date/time setting.

5. Admin Email Settings in CentOS Web Panel
You require to add an email address in order to receive important emails from the system. Visit the CWP Settings → Edit Settings page to update the same. There, add the email address to the Admin Email field as well as tick the Forward server system emails checkbox.
Optionally, you can add an email address for CSF/LFD firewall alerts there too. We will cover this in a separate article.
6. Setting up Default Web Servers
Control Web Panel offers standalone as well as a combination of Apache and Nginx web servers along with Varnish cache. However, Varnish caching is available in the pro version only.
Visit the WebServer Settings → Select WebServers link to open the webserver setup page. There are different webservers options available to choose from along with performance comparison. I have used Nginx & Apache server option in the free version. Whereas for the pro version, I recommend Nginx & Varnish & Apache along with PHP-FPM.
After changing the web server, click the Save & Rebuild Configuration button. It will take a little time to build the server.
7. Choosing the Right PHP Version
The 0.9.8.x version of the Control Web Panel (CWP) comes with PHP 5.6.x version enabled by default which is quite outdated. So it requires updating the PHP version to a newer one.
Visit the PHP Settings → PHP Version Switcher page. It will display the main PHP version in use. Here you can select the desired improved version of PHP. It will update the version in the background and take around 15 minutes.
Unfortunately, the free version of CWP doesn’t offer multiple PHP versions enabled. So a pro license is required to use another version of PHP other than the main one for a domain hosted on the VPS. Additionally, the CWP Pro allows using the PHP-FPM implementation for faster processing.
You can check all the pro features here. Also, the cost is almost $12/year which is quite affordable and quite lesser than the monthly cPanel price.
If you feel confused, here are the explanations of PHP switcher and selectors in the CentOS Web Panel.
PHP Version Switcher
Here you can select the default PHP version globally available for all domains in your VPS.
PHP Selector 2
This page lets you install additional PHP versions in the CWP VPS. This is the selector for the legacy CGI-based PHP method like SuPHP. You can use a different PHP-CGI version per account/domain rather than the default one after the installation from here.
PHP FPM Selector
This lets you also install and use additional PHP versions. The difference is that it selects PHP Fast CGI Manager (PHP-FPM) versions instead of traditional CGI.
Both selectors are the same as the multi PHP feature in cPanel. Also, multi PHP is a pro feature of CWP. Also, you don’t need to use both selectors. It should be either CGI or FPM versions selector.
8. Managing Hosting Packages in CWP
Hosting packages control resource allocation among user accounts on the VPS. CWP comes with a predefined package which you need to review and modify if requires. Additionally, you can create new hosting packages there as per the requirements.
Visit the Packages → Packages link to view the list of available packages as well as add new ones. Horizontally scroll to the right in a row if you can’t see the icons to manage a specific package.
9. CentOS Web Panel – User Accounts
Creating user accounts and managing websites within them are integral parts of web hosting. Reach to the User Accounts → New Account page and create a new account there. While the fields are self-explanatory, there are a few things to note.

The domain name is the primary domain for the user account. There is no limit on user accounts you can create. But each account should have a domain associated. Additional or addon domains can be created using the Domains → Add Domain link as the package allows.
If the domain is already pointing to the server then you can enable the AutoSSL feature. It will create a free SSL certificate from the Let’s Encrypt authority for the website to use a secured connection (HTTPS).
Alternatively, you can enable the AutoSSL feature later as described in the next section after pointing the domain to your nameservers.
Accessing User Account
Once a user account is set up, the user can access it by visiting the hostname URL at port number 2083 (https://server.example.com:2083). This is a sleek interface to manage all hosting stuff within that account. This is similar to a shared hosting account you have already experienced.
While you can manage all hosting aspects for the user using the admin panel too, it is better to manage them within this user account panel itself. It saves you from file permission errors as well as other issues in running websites.
Checking Website in CWP
If a domain in the user account is pointing to the VPS, you can check it in the browser. It will display the default CWP page.

10. Enable Admin Services in SSL Certificates Module
Visit the WebServer Settings → SSL Certificates page. This module has various tabs to manage certificates. The first tab, List Installed shows active SSL certificates.
Unlike cPanel, the certificate on CWP doesn’t apply automatically to the Mail, Webmail, FTP, and cPanel services to use a secured SSL connection with them. So here you need to manually add them via the Admin Services button for the specific domain.
Additionally, the AutoSSL (FREE) tab allows you to acquire an SSL certificate for a domain if you haven’t obtained it when it was added.
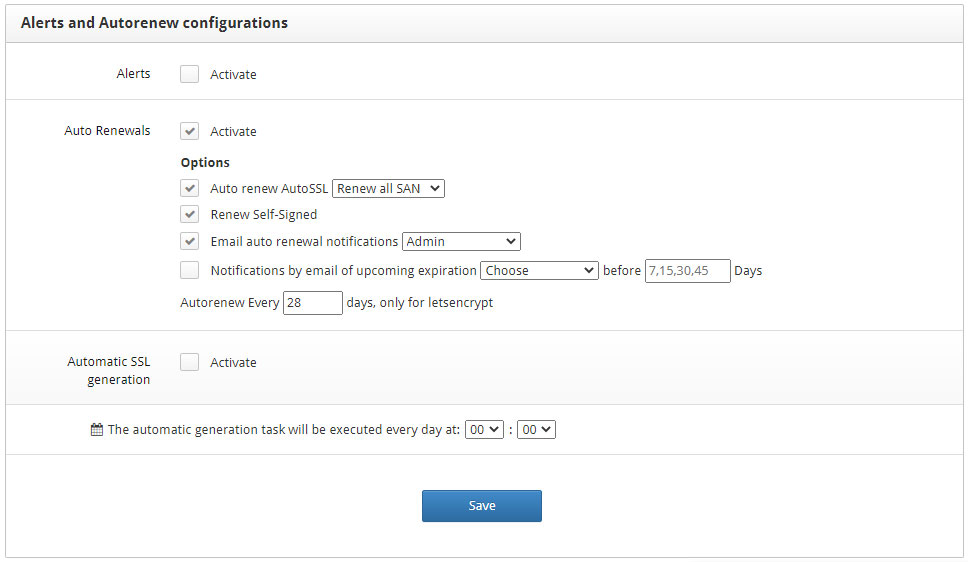
Finally, have a look at the Configure tab for SSL certificates. There are a few settings to tweak. I’m posting a screenshot of the Alerts and Autorenew configurations tab from my VPS.
Install & Configure CWP on CentOS – What is Next?
Till now, you have installed CWP and configured it to the elementary level. The VPS powered with CentOS Web Panel is ready to do its job.
Using the Admin/User panel, you can set up further things like email accounts, databases, Cron Jobs as well as uploading websites through an FTP client and many others. Managing your own server is an exciting task.
You have covered a lot of things here about VPS and server management. However, we haven’t covered the important CSF/LFD firewall yet in CWP. I will try publishing them sooner.
I would also like to share a couple of things like VPS optimization and related topics for better management. I will publish them very sooner for a complete VPS administration.
Hello Amit:
I am following your guide to setup a vps on this page:
https://fellowtuts.com/hosting/install-configure-cwp-centos-complete-guide-vps/
As soon as i finish with step3, CWP lose connections and the browser shows this page that it can not establish a connection to the server.
This is my second time following this guide. I had to reinstall the vps and CWP. Do you have any solution? thank you for your help.
We want to use CWP to self host many websites with many subdomains, along with our company email. But it makes no sense to have to assign a domain to every one of our 18 users. Isn’t there a way to have all domains belong to root or an admin user?
Hi…
I would like to ask a few question regarding CWP…
I have a VPS hosted by contabo and my domain pointed to Contabo DNS…
Can i use CWP without changing my domain name server record with hoster.. Should i setup another nameserver in CWP?
Thanks
Good day,
I Have read your article. Do you have any information on how to setup port forwarding on centos8. I have setup port forwarding in my router from my local IP to my Public IP, but I can only access my CWP panel from my local IP and not my Public IP. My ISP says they dont block any ports. I have setup static IP for my local Centos 8 PC.