Setting up plugins and a theme are the next things to do after installing WordPress for your website. Here, I’m explaining 3 different ways to install a WordPress plugin, either it is free or a premium one. You will also learn to install plugins via the WordPress admin as well as manually using FTP.
WP plugins are programs that empower the WordPress website with features to attend specific tasks. Adding contact forms, restricting content, or turning the site into an online e-commerce store are such a few examples. There are more than 55,000 free and paid plugins for almost any functionality in WordPress.

So in this beginner-level article, I’m describing 3 ways to install plugins on a WordPress website. Additionally, There are useful FAQs about plugins. Like their impact on the website, and things you should care about while using plugins.
How to Install a Free WordPress Plugin through Search
The search method is the most common and easiest way to install WP plugins. However, it applies to free plugins only that are listed in the official WordPress repository. Any paid/pro or premium plugin can’t be installed using this method.

And here are the steps.
- Login to the WordPress backend or admin area.
- Click Add New from Plugins link on the left vertical menu.
- Type the name or keywords related to the desired free plugin.
- The Search Results will list a number of relevant plugins.
- Find the specific plugin you are looking for.
- Optionally, choose the plugin that is best for you by clicking the More Details link.
- Click the Install Now button of the chosen plugin.
WordPress will now download and install the plugin for you. When it finishes, you will notice that the Install Now button has turned into the Activate button.
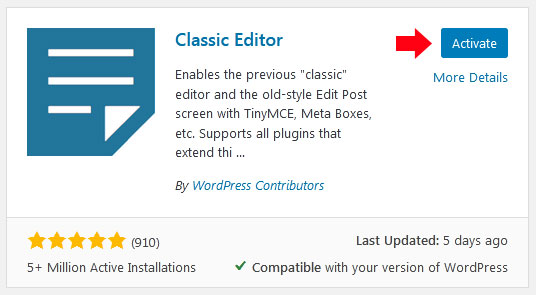
WordPress requires to activate a plugin to let it work. So go ahead and click on the Activate button. Thereafter, you can start using the plugin on the website.
The next step is to configure the plugin settings. However, settings vary from plugin to plugin. Therefore I suggest checking plugin-specific documentation to configure it properly.
Install WP Premium Plugin without FTP from Zip File
WordPress offers the upload method to install plugins that aren’t listed in the WP plugins repository. So use this second method for installing paid or premium plugins on your website.
This doesn’t require an FTP client. But you need to first download a compressed (zip) copy of the plugin on your computer from the source.

Afterward, follow these steps:
- Login to the WordPress backend or admin area.
- Click Add New from Plugins link on the left vertical menu.
- Click on the Upload Plugin button next to the Add Plugins label.
- This will display the plugin upload form.
- Use the Browse button and select the plugin’s zip file from the downloaded location on your computer.
- Alternatively, you can drag the zip file and drop it to the upload dialog box as well.
- Press the Install Now button.
WordPress will now upload the plugin file from your computer and display the installation process like this below. You will notice an Activate Plugin button after it completes. Finally, click on this button to activate the plugin and start using it.

Most probably, you would need to configure the plugin settings now. This process is different for each plugin. So check the documentation of the plugin for the same.
How to Manually Install a Plugin with FTP
Although this method isn’t beginner-friendly, it is quite popular among developers. That is because developers use FTP programs in their day to day life. However, this requires a little prior knowledge of FTP client software.
FTP client software, initiates a connection to the webserver. After a successful connection, the client (your computer) can perform file operations like upload, download files, rename, delete files on the server.
Additionally, you require having FTP credentials to connect to the server. The host usually sends when you buy the hosting plan. WinSCP is my favorite free FTP program for Windows. While FileZilla is available for Mac, Linux, as well as Windows.

Above is a screenshot of the WinSCP FTP client to upload the plugin directory to the hosting server. The steps to install plugins are as follow:
- Open the FTP program on your computer.
- Connect to your website using the FTP credentials.
- Go inside the /wp-content/plugins/ folder on your website’s hosting space.
- Upload the extracted plugin folder to the location mentioned above, on the server.
- Visit the WordPress admin area.
- Click Plugins from the left vertical menu.
- The name of the plugin will list in a row as per alphabetical order.
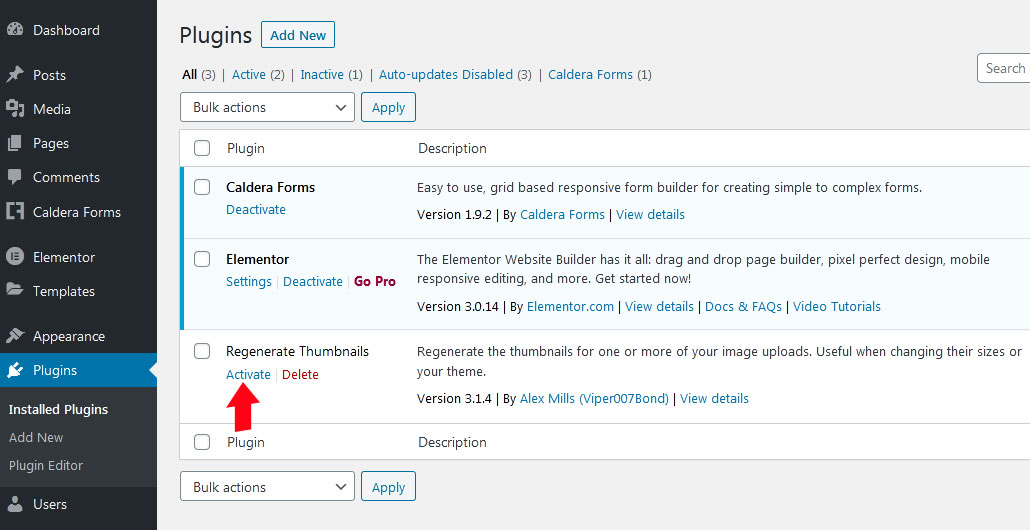
It is how you manually install a WordPress plugin using an FTP client. Thereafter, activate the plugin by clicking the link below its name to start using it.
Most plugins require you to configure their settings to work properly. So check the knowledge base of the installed plugin and follow steps accordingly.
A note about the extracted plugin: If your plugin’s files and directories appear like plugin_name/plugin_name/plugin_files_and_directories then move them one level up so that they could appear directly inside the plugin folder, ie plugin_name/plugin_files_and_directories.
FAQs on Install & Use Plugins in WordPress
It’s obvious that you may have a few questions about installing plugins on WordPress websites. So I have collected common questions and answers below. I have also answered concerns regarding the plugins’ uses.
If you have more questions about installing plugins or related, I would be happy to answer in the comment form below.
How Many Plugins should I Install?
This is very subjective. Every website has different requirements so there is no single number to justify as an answer. However, the simple answer is, keep this number as low as possible.
You should install those WordPress plugins only that are essential to run your website. The fewer plugins a website has, the better its performance and load time is. Additionally, it will also save your website from the security concerns involved with plugins.
Hope this article helped you to understand different ways to install plugins on a WordPress website as well as activate them. If you have any queries, please use the form below to comment.