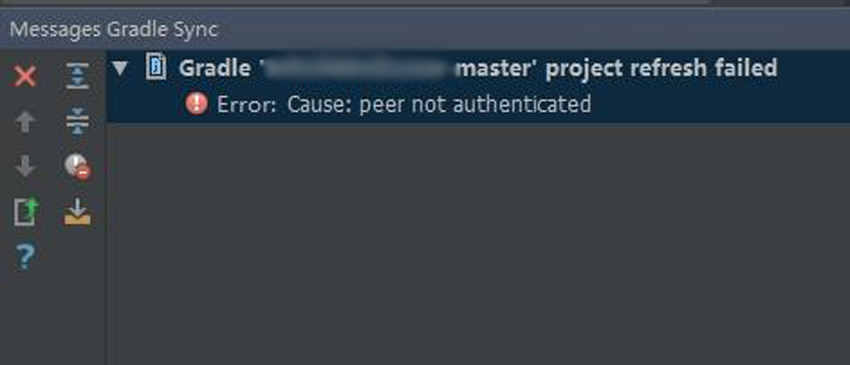
Gradle is one core component of Android Studio. Every project runs only after a successful Gradle build. However, there might be times when the Gradle fails to sync. Gradle: Project refresh failed. Cause: Peer not authenticated is such one error.
Here are a few possible solutions to fix the Peer not authenticated error in Android Studio. In this article, we have also explained how can you identify the actual cause of the error.

Android Studio Gradle Refresh/Build Failed – Causes
There might be a hundred reasons of the project build failure. Fortunately, Android Studio offers a details log to deep investigate the cause. We will sooner update you with the stack trace and log Android Studio provides to debug a project.
Further, before applying any given solution, take advantage of this feature. Finding the right cause and applying the correct solution saves a lot of your precious time. Since app development isn’t as easy as web development, you can feel what I mean when I said “time”.
So you have found the primary reason that you’re facing Peer not authenticated issue. Now below are possible solutions. You can easily identify which one will be great to rectify the concern.
1. Invalidate Caches / Restart
The first thing you can do to resolve the peer not authenticated error is invalidating caches and restarting Android Studio. This option is available in the File menu. After the restart, Android Studio will try to index files as well as rebuild the Gradle.
2. Synchronize Files
You can also try synchronizing files in the above solution doesn’t work. This option is also present in the File menu. Alternatively, you can use Ctrl + Alt + Y keys combination in a Windows PC.
Useful reading:
3. Keep the Gradle and Android Plugin Versions Updated
An inconsistency between the Gradle version and the Android plugin version used for the Gradle might cause the trouble. There are different versions of Gradle and corresponding Android plugin version exist. All you need is to use right versions of the both.
Not only for peer not authenticated error but also for many others, this solution works pretty well in most cases. It is a relevant yet descriptive topic to cover in a separate post. We will publish an article soonest to let you understand the compatibility as well as how to set up them properly.
4. Invalid Certificate Causing Peer Not Authenticated Error – Fixing
It’s the root cause that makes the project refresh failed. You’re trying to connect using HTTPS protocol. However, the client is unable to validate the server’s certificate.
Adding an up-to-date certificate is the extrication. However, the steps are different for each operating system. So we will cover them very soon in separate articles as well.
Alternatively, you can use non-secured HTTP connections as shown below. Still, certificate installation is the best approach.
5. Use HTTP Protocol for Repositories
You can also try to replace secured HTTPS protocol with plain HTTP one for repository URLs. To do this open the project’s build.gradle file and change as follow:
1 2 3 4 5 6 7 8 9 10 | repositories { jcenter() //jcenter{ url 'https://jcenter.bintray.com/' } } //HTTPS Changed To HTTP repositories { jcenter{ url 'http://jcenter.bintray.com/' } } |
Replace all the occurrences in the file and sync the project/restart the Android Studio. The peer not authenticated error should get resolved. Additionally, in case of the failure, you should try the same with the maven repositories.
Some people have fixed the issue by changing HTTPS to HTTP in the distributionUrl parameter. Open ‘<project>/gradle/wrapper/gradle-wrapper.properties’ file and remove the s from the URL.
1 | distributionUrl=http\://services.gradle.org/distributions/gradle-XYZ.zip |
Here XYZ is the version of your Gradle plugin in the project. Finally, sync the project to take effect.
Last but not least, this is only a temporary solution and you shouldn’t depend on it. Fixing the root cause as mentioned in the previous section is the best workaround.
6. HTTP Proxy to Resolve Peer Not Authenticated Issue
The HTTP Proxy option is present in the File > Settings > Appearance & Behavior > System Settings menu. You can try fixing with No proxy, Auto-detect or Manual Proxy Configuration options.
First of all, click the Clean Project option in the Build menu. At the same time, notice any failure information in the Gradle Console. This window expands upon clicking to the Gradle Console button located at the bottom right corner in Android Studio.
If the build fails to download a file, the Console will have the information of the URL. Now open the URL in a browser. Failing to open the URL in the browser means your proxy settings have some trouble. Although this may be true that the browser may have proper proxy settings configured.
If the URL is loading fine then focus on the solution number four or five above.
Peer Not Authenticated | Gradle Project Refresh Failed – Oh!
We have listed the most common causes and solutions to the Peer not authenticated issue in Android Studio. Additionally, some people may have specific cases as well regarding this trouble. Like a developer has updated the JAVA version installed in the system. So he had empty Certificate Keystore.
Another one had redirection problem so he updated the repository URL to the later one. Similarly, you might also have such a unique experience with Peer not authenticated error. Would you like to share with us?
Sharing is caring! So experience shared by you can make a successful Gradle refresh for another. Also, we would be happy to list your solution in the article. Additionally, have you benefited from either solution? We would like to know. Don’t forget to update us using the given comment form.